为了部署在GitHub的静态项目请求后台数据,购买了阿里云服务器,记录搭建开发环境,用到java,mysql,tomcat
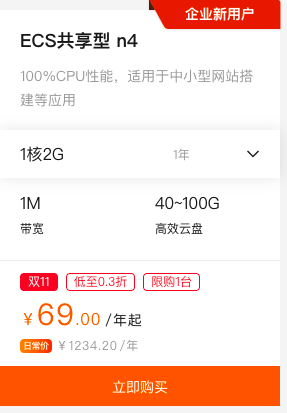
1. 购买云服务器 本来云服务器有免费试用一个月的活动,但域名购买必须对应ecs云服务器购买三个月以上,所以还是购买了一年的服务器。优惠价 ,安装了centos7
2. 连接 2.1. 终端ssh 用于命令操作云服务器
2.2. 文件传输 transmit5.0.4.dmg 软件,用于传输下载的java.tar.gz,tomcat等
链接: https://pan.baidu.com/s/1tFJlwyftJDZI9Mc45KYbhQ 提取码: 5an5
3. java 安装jdk1.8,下载地址https://www.oracle.com/java/technologies/downloads/#java8
方便管理新建app目录,把各种环境放到该目录下。
1
2
3
4
5
6
[root@centos7 ~]# cd / [root@centos7 /]# mkdir app [root@centos7 /]# cd app [root@centos7 app]# mkdir mysql [root@centos7 app]# mkdir tomcat [root@centos7 app]# mkdir java
利用transmit把下载的文件放到java文件夹下,解压并配置java环境变量
1
2
3
4
5
6
[root@centos7 ~]# cd /app/java [root@centos7 java]# [root@centos7 java]# ls -l 总用量 143364 -rw-r--r-- 1 root root 146799982 11月 13 20:22 jdk-8u311-linux-x64.tar.gz [root@centos7 java]# tar -zxvf jdk-8u311-linux-x64.tar.gz
配置环境变量
输入命令cd ~回车,进入到用户目录下,使用vi编辑配置文件,输入vi .bash_profile回车
1
2
3
4
5
6
7
8
9
[root@centos7 java]# cd ~ [root@centos7 ~]# vi .bash_profile [root@centos7 ~]# cd /app/java [root@centos7 java]# ls -l 总用量 143368 drwxr-xr-x 8 10143 10143 4096 9月 27 20:29 jdk1.8.0_311 -rw-r--r-- 1 root root 146799982 11月 13 20:22 jdk-8u311-linux-x64.tar.gz [root@centos7 java]# cd ~ [root@centos7 ~]# vi .bash_profile
插入
1
2
3
export JAVA_HOME=/app/java/jdk1.8.0_311 export CLASSPATH=.:$JAVA_HOME/lib/dt.jar:$JAVA_HOME/lib/tools.jar export PATH=$PATH:$JAVA_HOME/bin
可以删掉export PATH
使其生效
1 [root@centos7 ~]# source ~/.bash_profile
现在可以用命令java了
1
2
3
4
5
[root@centos7 ~]# java -version java version "1.8.0_311" Java(TM) SE Runtime Environment (build 1.8.0_311-b11) Java HotSpot(TM) 64-Bit Server VM (build 25.311-b11, mixed mode) [root@centos7 ~]#
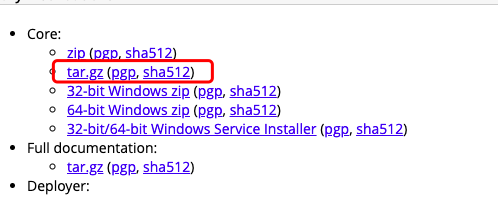
4. tomcat 4.1. 安装 下载 https://tomcat.apache.org/download-90.cgi#9.0.54
下载好的压缩文件传输到 /app/tomcat目录下
解压文件
1
2
3
4
5
[root@centos7 ~]# cd /app/tomcat [root@centos7 tomcat]# ls -l 总用量 11308 -rw-r--r-- 1 root root 11576317 11月 13 20:22 apache-tomcat-9.0.54.tar.gz [root@centos7 tomcat]# tar -zxvf apache-tomcat-9.0.54.tar.gz
进入到bin文件下启动tomcat
1
2
3
4
5
6
7
8
9
[root@centos7 tomcat]# cd apache-tomcat-9.0.54/bin [root@centos7 bin]# sh startup.sh Using CATALINA_BASE: /app/tomcat/apache-tomcat-9.0.54 Using CATALINA_HOME: /app/tomcat/apache-tomcat-9.0.54 Using CATALINA_TMPDIR: /app/tomcat/apache-tomcat-9.0.54/temp Using JRE_HOME: /app/java/jdk1.8.0_311 Using CLASSPATH: /app/tomcat/apache-tomcat-9.0.54/bin/bootstrap.jar:/app/tomcat/apache-tomcat-9.0.54/bin/tomcat-juli.jar Using CATALINA_OPTS: Tomcat started.
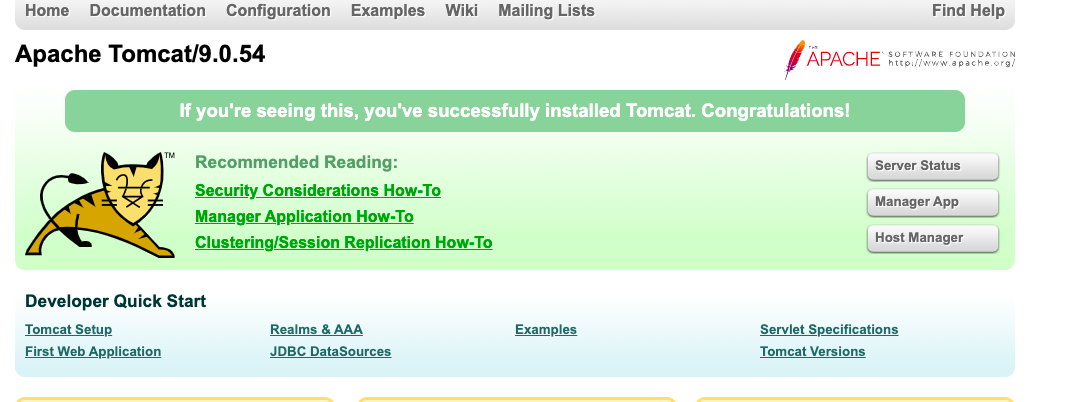
现在理论可以用 http://ip:8080 访问了,不过阿里云默认不放开8080端口
4.2. 开放8080端口 1 2 3 4 5 6 7 8 9 10 11 12 13 14 15 16 17 18 19 20 21 [root@centos7 bin]# systemctl start firewalld [root@centos7 bin]# firewall-cmd --zone=public --add-port=8080/tcp --permanent success [root@centos7 bin]# firewall-cmd --reload success [root@centos7 bin]# firewall-cmd --list-all public target: default icmp-block-inversion: no interfaces: sources: services: ssh dhcpv6-client ports: 8080/tcp protocols: masquerade: no forward-ports: source-ports: icmp-blocks: rich rules: [root@centos7 bin]#
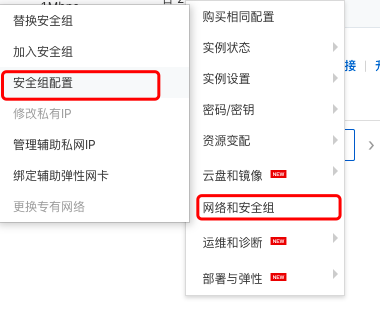
4.3. 开放阿里云服务器8080端口 登陆阿里云,进入控制台,找到云服务器实例,选择操作的【更多】,【网络和安全组】下的【安全组配置】的【配置规则】
手动添加入方向
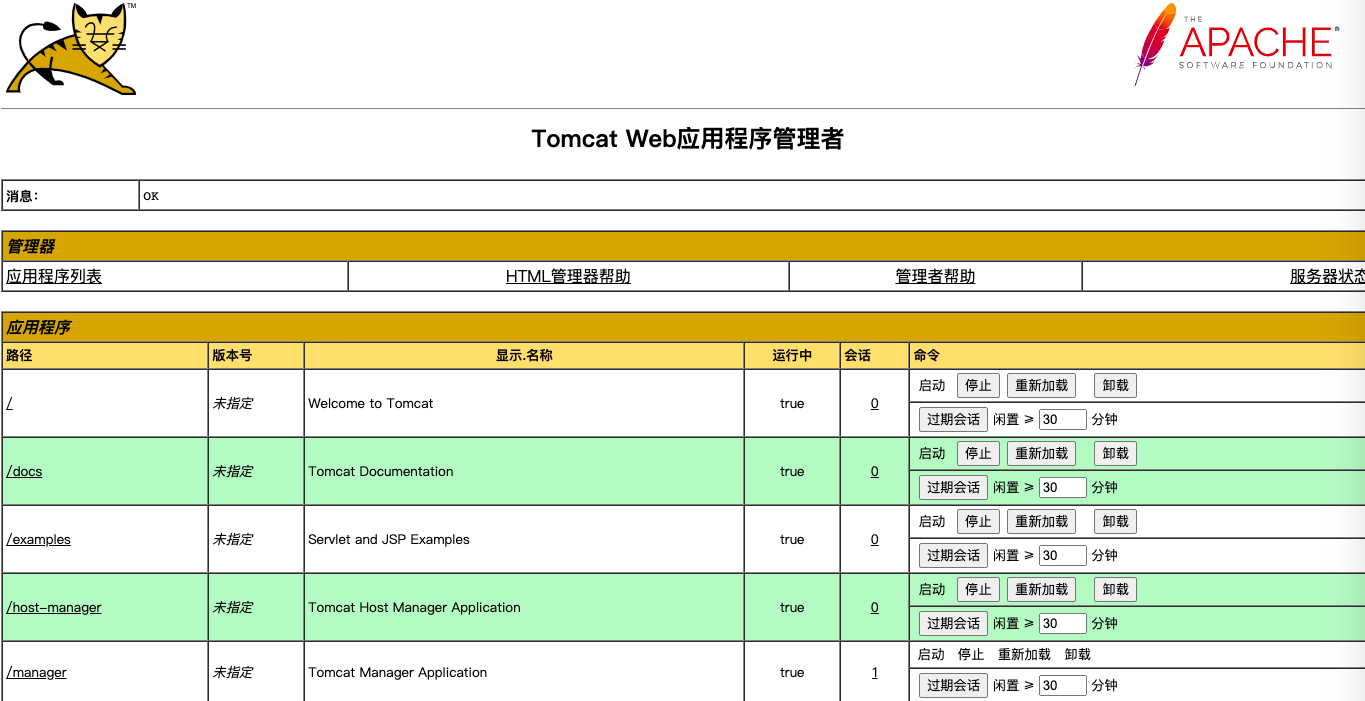
现在可以访问了
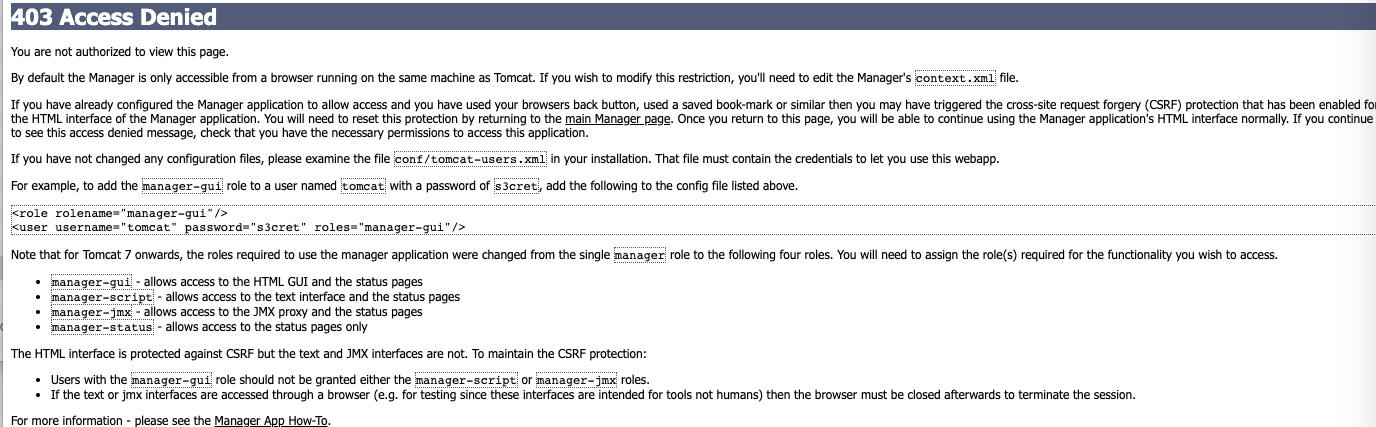
4.4. 修改tomcat用户名和密码 点击页面的Manager App,得到一个文档
进入/app/tomcat/apache-tomcat-9.0.54/conf/把 tomcat-users.xml复制到本地,添加
1 2 <role rolename ="manager-gui" /> <user username ="root" password ="root" roles ="manager-gui" />
保存,上传覆盖掉原来的版本,重启tomcat,重新访问即可
4.5. tomcat进入管理页面403解决方案 如果发现点击Manager App,还是之前的403页面,不会弹出来登录框,那么这个问题就是你的ip地址被拦截了,解决方案如下:
进入tomcat目录apache-tomcat-9.0.54/webapps/manager/META-INF这个目录下
修改文件context.xml,注释掉 <value>那一行
1 2 3 4 5 6 7 <Context antiResourceLocking ="false" privileged ="true" > <CookieProcessor className ="org.apache.tomcat.util.http.Rfc6265CookieProcessor" sameSiteCookies ="strict" /> <Manager sessionAttributeValueClassNameFilter ="java\.lang\.(?:Boolean|Integer|Long|Number|String)|org\.apache\.catalina\.filters\.CsrfPreventionFilter\$LruCache(?:\$1)?|java\.util\.(?:Linked)?HashMap" /> </Context >
现在可以输入账号密码访问了
5. mysql 5.1. 下载mysql 下载 https://downloads.mysql.com/archives/community/
建议下载5.6的版本,更稳定一些(据说linux安装5.7版本会经常出现一些bug很麻烦
传输文件到/app/mysql,解压,重命名
1 2 3 [root@centos7 bin]# cd /app/mysql [root@centos7 mysql]# tar -zxvf mysql-5.6.30-linux-glibc2.5-x86_64.tar.gz [root@centos7 mysql]# mv mysql-5.6.30-linux-glibc2.5-x86_64 mysql-5.6.30
5.2. 安装mysql 创建一个mysql用户:
1 [root@centos7 mysql]# useradd mysql
设置mysql用户密码:
1 2 3 [root@centos7 mysql]# echo '123456'|passwd --stdin mysql 更改用户 mysql 的密码 。 passwd:所有的身份验证令牌已经成功更新。
修改当前目录的拥有者为mysql用户:
1 [root@centos7 mysql]# chown -R mysql:mysql ./
切换到mysql用户下:
1 2 [root@centos7 mysql]# su - mysql [mysql@centos7 ~]$
进入安装目录的scripts目录下面:cd /app/mysql/mysql-5.6.30/scripts
安装:./mysql_install_db –user=mysql –basedir=/app/mysql/mysql-5.6.30 –datadir=/app/mysql/mysql-5.6.30/data
命令里basedir是你的mysql根目录,datadir是mysql目录下的data目录
❌ Installing MySQL system tables…/app/mysql/mysql-5.6.30/bin/mysqld: error while loading shared libraries: libaio.so.1: cannot open shared object file: No such file or directory ❌
这是因为缺少类库,需要对应安装:
yum安装都需要切到root用户下执行命令。 切回root用户:su - root,需要输入你的root用户的密码
执行
1 2 3 4 [mysql@centos7 scripts]$ su - root Password: [root@centos7 ~]# yum -y install autoconf [root@centos7 ~]# yum -y install libaio
切换到mysql继续安装
1 2 3 [root@centos7 ~]# su - mysql [mysql@centos7 ~]$ cd /app/mysql/mysql-5.6.30/scripts [mysql@centos7 scripts]$ ./mysql_install_db --user=mysql --basedir=/app/mysql/mysql-5.6.30 --datadir=/app/mysql/mysql-5.6.30/data
5.3. 配置mysql,启动mysql 切到root用户下,进入到你的mysql安装目录下,
1 2 [mysql@centos7 scripts]$ su - root [root@centos7 ~]# cd /app/mysql/mysql-5.6.30/
修改当前目录拥有者为root用户,执行
1 [root@centos7 mysql-5.6.30]# chown -R root:root ./
修改当前data目录拥有者为mysql用户,执行
1 2 3 4 5 6 7 8 9 10 11 12 13 14 15 16 17 18 [root@centos7 mysql-5.6.30]# ls -l total 76 drwxr-xr-x 2 root root 4096 Nov 17 02:24 bin -rw-r--r-- 1 root root 17987 Mar 3 2016 COPYING drwxr-xr-x 5 root root 4096 Nov 17 02:38 data drwxr-xr-x 2 root root 4096 Nov 17 02:25 docs drwxr-xr-x 3 root root 4096 Nov 17 02:24 include drwxr-xr-x 3 root root 4096 Nov 17 02:25 lib drwxr-xr-x 4 root root 4096 Nov 17 02:25 man -rw-rw-r-- 1 root root 943 Nov 17 02:35 my.cnf -rw-rw-r-- 1 root root 943 Nov 17 02:38 my-new.cnf drwxr-xr-x 10 root root 4096 Nov 17 02:25 mysql-test -rw-r--r-- 1 root root 2496 Mar 3 2016 README drwxr-xr-x 2 root root 4096 Nov 17 02:25 scripts drwxr-xr-x 28 root root 4096 Nov 17 02:25 share drwxr-xr-x 4 root root 4096 Nov 17 02:25 sql-bench drwxr-xr-x 2 root root 4096 Nov 17 02:25 support-files [root@centos7 mysql-5.6.30]# chown -R mysql:mysql data
建立mysql软链接,执行
1 [root@centos7 mysql-5.6.30]# ln -s /app/mysql/mysql-5.6.30/bin/mysql /usr/bin/mysql
执行
1 2 [root@centos7 mysql-5.6.30]# cp support-files/mysql.server /etc/init.d/mysql [root@centos7 mysql-5.6.30]# cp support-files/my-default.cnf /etc/my.cnf
然后需要在/etc/init.d/mysql和/etc/my.cnf配置文件中
1 2 [root@centos7 mysql-5.6.30]# vi /etc/init.d/mysql [root@centos7 mysql-5.6.30]# vi /etc/my.cnf
添加两行,就是mysql安装目录和目录下data
1 2 basedir=/app/mysql/mysql-5.6.30 datadir=/app/mysql/mysql-5.6.30/data
然后就可以启动mysql服务啦,执行
1 2 [root@centos7 mysql-5.6.30]# service mysql start Starting MySQL. [ OK ]
查看进程ps -ef|grep mysql,已经起来啦
5.4. mysql命令 1 2 3 [root@centos7 mysql-5.6.30]#启动mysql命令:service mysql start [root@centos7 mysql-5.6.30]#关闭mysql命令:service mysql stop [root@centos7 mysql-5.6.30]#查看运行状态命令:service mysql status
5.5. 修改密码 修改mysql的root用户密码,root初始密码为空的,执行
1 2 [root@centos7 mysql-5.6.30]# ./bin/mysqladmin -u root password '密码' Warning: Using a password on the command line interface can be insecure.
设置好密码后登陆root用户,执行mysql -uroot -p 输入密码
1 2 3 4 5 6 7 8 9 10 11 12 13 14 15 16 [root@centos7 mysql-5.6.30]# [root@centos7 mysql-5.6.30]# mysql -uroot -p Enter password: Welcome to the MySQL monitor. Commands end with ; or \g. Your MySQL connection id is 2 Server version: 5.6.30 MySQL Community Server (GPL) Copyright (c) 2000, 2016, Oracle and/or its affiliates. All rights reserved. Oracle is a registered trademark of Oracle Corporation and/or its affiliates. Other names may be trademarks of their respective owners. Type 'help;' or '\h' for help. Type '\c' to clear the current input statement. mysql>
查看基础数据库
1 2 3 4 5 6 7 8 9 10 11 12 13 mysql> show databases; +--------------------+ | Database | +--------------------+ | information_schema | | mysql | | performance_schema | | test | +--------------------+ 4 rows in set (0.00 sec) mysql> exit ;Bye
5.6. 开放3306端口 5.6.1. 查看防火墙 查看防火墙状态:service iptables status
开启防火墙:service iptables start
关闭防火墙:service iptables stop
1 2 3 [root@centos7 mysql-5.6.30]# service iptables status Redirecting to /bin/systemctl status iptables.service Unit iptables.service could not be found.
❌ 出现报错:Unit iptables.service could not be found. ❌
这是因为CentOS7默认的防火墙不是iptables,而是firewalle。出现此情况可能是iptables防火墙未安装。
如果只是想开放某个端口的防火墙,那么有两种选择:
1.firewalld 防火墙;
2.iptables防火墙。
如果你选择第一种,则不用安装iptables
下面介绍firewalld 防火墙开放端口的方法和iptables的安装方法
5.6.2. firewalld 防火墙开放端口 查看firewalld状态:systemctl status firewalld
开启firewalld:systemctl start firewalld
如果启动报错:Failed to start firewalld.service: Unit is masked.
是因为被锁定了,取消firewalld的锁定:systemctl unmask firewalld,再启动即可。
开放某个端口:firewall-cmd –zone=public –add-port=3306/tcp –permanent
重新载入:firewall-cmd –reload
查看开放的所有端口:firewall-cmd –list-all
1
2
3
4
5
6
7
8
9
10
11
12
13
14
15
16
17
18
19
20
21
[root@centos7 mysql-5.6.30]# systemctl start firewalld [root@centos7 mysql-5.6.30]# firewall-cmd --zone=public --add-port=3306/tcp --permanent success [root@centos7 mysql-5.6.30]# firewall-cmd --reload success [root@centos7 mysql-5.6.30]# firewall-cmd --list-all public target: default icmp-block-inversion: no interfaces: sources: services: ssh dhcpv6-client ports: 3306/tcp 8080/tcp protocols: masquerade: no forward-ports: source-ports: icmp-blocks: rich rules: [root@centos7 mysql-5.6.30]#
5.6.3. 利用iptables开放端口 5.6.3.1. 安装iptables服务 首先,停止firewalld服务,执行:systemctl stop firewalld
禁用firewalld服务,执行:systemctl mask firewalld
执行:systemctl unmask firewalld
安装iptables服务,执行:yum -y install iptables-services
设置开机启动,执行:
systemctl enable iptables
systemctl stop iptables
systemctl start iptables
systemctl restart iptables
service iptables save
5.6.3.2. iptables开放端口 先停掉防火墙 service iptables stop
关闭firewalld:
systemctl stop firewalld
开放3306端口,执行:iptables -A INPUT -p tcp –dport 3306 -j ACCEPT
后面如果还有端口要开放,直接在文件/etc/sysconfig/iptables里照着样子添加一行即可
1 2 3 [root@centos7 mysql-5.6.30]# vi /etc/sysconfig/iptables -A INPUT -p tcp -m tcp --dport 3306 -j ACCEPT
保存,执行:service iptables save
开启服务,执行:systemctl restart iptables.service
查看防火墙状态:service iptables status
5.6.4. 开放阿里云服务器3306端口 登陆阿里云,进入控制台,找到云服务器实例,选择操作的【更多】,【网络和安全组】下的【安全组配置】的【配置规则】
5.7. 开放远程连接权限 连接mysql出现错误
1130 - Host 'ip' is not allowed to connect to this MySQL server
说明所连接的用户账户没有远程连接的权限,只能在本机localhost登录。需要更改 mysql 数据库里的 user表里的 host字段 把localhost改成%。
执行mysql -u root -p,输入密码
进入mysql控制台,进入数据库:use mysql;
更改host字段值:update user set host=’%’ where host=’localhost’
刷新:flush privileges;
查看:select host,user from user;
命令
1 2 3 4 5 6 7 8 9 10 11 12 13 14 15 16 17 18 19 20 21 22 23 24 25 26 27 28 29 30 31 32 33 34 35 36 37 38 39 40 41 mysql> use mysql; Reading table information for completion of table and column names You can turn off this feature to get a quicker startup with -A Database changed mysql> mysql> select host,user from user; +-----------+------+ | host | user | +-----------+------+ | 127.0.0.1 | root | | ::1 | root | | centos7 | | | centos7 | root | | localhost | | | localhost | root | +-----------+------+ 6 rows in set (0.00 sec) mysql> mysql> update user set host='%' where host='localhost' ; Query OK, 2 rows affected (0.00 sec) Rows matched: 2 Changed: 2 Warnings: 0 mysql> flush privileges; Query OK, 0 rows affected (0.00 sec) mysql> select host,user from user; +-----------+------+ | host | user | +-----------+------+ | % | | | % | root | | 127.0.0.1 | root | | ::1 | root | | centos7 | | | centos7 | root | +-----------+------+ 6 rows in set (0.00 sec) mysql>
此时连接成功
6. 导入springboot项目到服务器 把tomcat项目部署到云服务器上运行
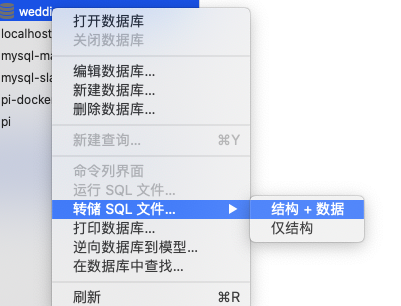
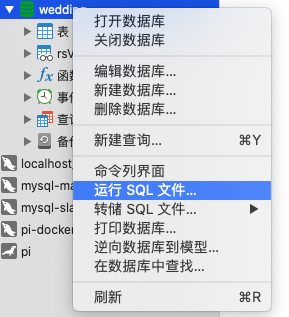
6.1. 测试mysql连接 先导入sql语句到云服务器,点击数据库,点击【转储SQL文件】
连接云服务器,创建数据库,运行sql文件,创建数据库和表
前端配置的mysql-connector运行版本为runtime,这里不必要过多考虑jar包问题
1 2 3 4 5 <dependency > <groupId > mysql</groupId > <artifactId > mysql-connector-java</artifactId > <scope > runtime</scope > </dependency >
修改springboot项目中的数据库连接
1 2 3 4 spring.datasource.driver-class-name=com.mysql.cj.jdbc.Driver spring.datasource.url=jdbc:mysql://公网ip:3306/wedding spring.datasource.username=账号 spring.datasource.password=密码
测试是否成功!
6.2. 打包springboot项目 因为发布在外部tomcat中,application.properties文件配置是8090无效
打包方式
jar包部署方式使用Spring Boot 自带的Tomcat,因为Spring Boot 应用自带Tomcat,所以可直接在服务器运行jar文件
war包部署方式则使用云服务器里的Tomcat,此时需要移除Spring Boot 自带的Tomcat插件
6.3. war形式打包 6.3.1. pom中打包规则为war形式 1 2 3 4 <properties > <java.version > 1.8</java.version > </properties > <packaging > war</packaging >
6.3.2. 移除嵌入式tomcat (provided:编译、测试时将依赖的包加入本工程的classpath,运行时不加入,可以理解成运行时不使用Spring Boot 自带的Tomcat)
1 2 3 4 5 6 7 8 9 10 11 <dependency > <groupId > org.springframework.boot</groupId > <artifactId > spring-boot-starter-web</artifactId > <exclusions > <exclusion > <groupId > org.springframework.boot</groupId > <artifactId > spring-boot-starter-tomcat</artifactId > </exclusion > </exclusions > </dependency >
6.3.3. 添加servlet-api的依赖 原理:maven里面在编译阶段是依赖servlet api的,所以当然要包含。但是在运行阶段是放到 tomcat 容器的,所以要设置好servlet依赖的scope。
1 2 3 4 5 6 <dependency > <groupId > javax.servlet</groupId > <artifactId > javax.servlet-api</artifactId > <version > 3.1.0</version > <scope > provided</scope > </dependency >
6.3.4. 修改启动类,并重写初始化方法 1 2 3 4 5 6 7 8 9 10 11 12 13 14 15 16 17 18 19 20 21 22 23 package com.wedding.blessing.danmu;import org.mybatis.spring.annotation.MapperScan;import org.springframework.boot.SpringApplication;import org.springframework.boot.autoconfigure.SpringBootApplication;import org.springframework.boot.builder.SpringApplicationBuilder;import org.springframework.boot.web.servlet.support.SpringBootServletInitializer;@SpringBootApplication(scanBasePackages = "com.wedding.blessing.danmu") @MapperScan(basePackages = "com.wedding.blessing.danmu.mapper") public class DanmuApplication extends SpringBootServletInitializer { @Override protected SpringApplicationBuilder configure (SpringApplicationBuilder builder) { return builder.sources(DanmuApplication.class); } public static void main (String[] args) { SpringApplication.run(DanmuApplication.class, args); } }
6.3.5. 四步打包生成war包
打开右侧maven
找到Lifecycle
双击运行package
在项目下target文件夹下找到同名war包,上传到服务器Tomcat/webapps/目录下,重命名
1 2 [root@centos7 tomcat]# cd /app/tomcat/apache-tomcat-9.0.54/webapps [root@centos7 webapps]# mv danmu-0.0.1-SNAPSHOT.war danmu.war
上传war之后,必须重启tomcat
访问:http://ip地址 : 外部tomcat端口号/war包全名/访问路径
7. 服务器安装ssl证书 7.1. 域名购买 阿里云购买
.com 首年63元
7.2. 备案 在中华人民共和国境内提供互联网信息服务,应当依法履行ICP备案和公安备案手续
从备案到管局通过大概需要20天
7.3. ssl证书购买 DigiCert 免费版 SSL
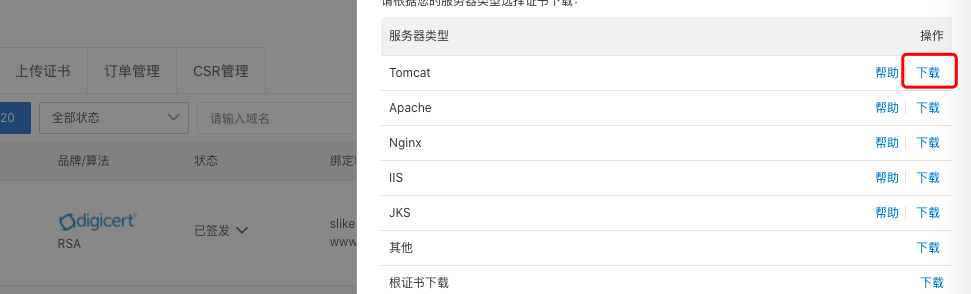
购买证书后,域名解析中会自动添加一条txt解析记录,下载对应证书文件
7.4. 安装 根据官方指示安装tomcat8
下载tomcat8 https://tomcat.apache.org/download-80.cgi#8.5.73
上传到云服务器的 /app/tomcat目录下,解压
1
2
3
[root@centos7 tomcat]# tar -zxvf apache-tomcat-8.5.73.tar.gz [root@centos7 tomcat]# cd apache-tomcat-8.5.73 [root@centos7 apache-tomcat-8.5.73]#
在apache-tomcat-8.5.73文件夹下重新cert文件夹,把下载后解压的的.pfx和.txt文件放到该文件夹下
1 2 3 [root@centos7 apache-tomcat-8.5.73]# mkdir cert [root@centos7 apache-tomcat-8.5.73]# cd cert [root@centos7 cert]#
7.4.1. 修改配置文件server.xml 1 2 3 4 [root@centos7 cert]# cd .. [root@centos7 apache-tomcat-8.5.73]# cd conf [root@centos7 conf]# vi server.xml
7.4.1.1. 修改tomcat端口为80 1 2 3 <Connector port ="8080" protocol ="HTTP/1.1" connectionTimeout ="20000" redirectPort ="8443" />
修改为
1 2 3 <Connector port ="80" protocol ="HTTP/1.1" connectionTimeout ="20000" redirectPort ="443" />
7.4.1.2. ssl实现方式 1 2 3 4 5 6 7 <Connector port ="8443" protocol ="org.apache.coyote.http11.Http11NioProtocol" maxThreads ="150" SSLEnabled ="true" > <SSLHostConfig > <Certificate certificateKeystoreFile ="conf/localhost-rsa.jks" type ="RSA" /> </SSLHostConfig > </Connector >
修改为
1 2 3 4 5 6 7 8 <Connector port ="443" protocol ="org.apache.coyote.http11.Http11NioProtocol" maxThreads ="150" SSLEnabled ="true" scheme ="https" secure ="true" > <SSLHostConfig > <Certificate certificateKeystoreFile ="/app/tomcat/apache-tomcat-8.5.73/cert/xxx.pfx" certificateKeystorePassword ="xxx" certificateKeystoreType ="PKCS12" /> </SSLHostConfig > </Connector >
7.4.1.3. 注释AJP 7.4.2. 修改web.xml 开启HTTP强制跳转HTTPS
</welcome-file-list>后添加以下内容
1 2 3 4 5 6 7 8 9 10 11 12 13 14 15 <login-config > <auth-method > CLIENT-CERT</auth-method > <realm-name > Client Cert Users-only Area</realm-name > </login-config > <security-constraint > <web-resource-collection > <web-resource-name > SSL</web-resource-name > <url-pattern > /*</url-pattern > </web-resource-collection > <user-data-constraint > <transport-guarantee > CONFIDENTIAL</transport-guarantee > </user-data-constraint > </security-constraint >
7.4.3. 校验配置文件语法 1 2 [root@centos7 apache-tomcat-8.5.73]# cd bin [root@centos7 bin]# sh configtest.sh
7.4.4. 开放443端口 1 2 3 4 5 6 [root@centos7 bin]# firewall-cmd --zone=public --add-port=80/tcp --permanent success [root@centos7 bin]# firewall-cmd --zone=public --add-port=443/tcp --permanent success [root@centos7 bin]# firewall-cmd --reload success
阿里云中也需要开放443端口,配置安全规则,配置规则,手动添加
7.4.5. 查看服务启动状态 1 [root@centos7 bin]# tailf logs/catalina.out
7.4.6. 查看服务器网络监听状态 1 2 [root@centos7 bin]# netstat -ntlp|grep 443 [root@centos7 bin]# netstat -ntlp|grep 80
都是listen状态,表示http和https服务都已开启监听
1 2 3 4 5 6 [root@centos7 apache-tomcat-8.5.73]# curl -I https://域名 HTTP/1.1 200 Cache-Control: private Content-Type: text/html;charset=UTF-8 Transfer-Encoding: chunked
7.4.8. 访问https://域名 7.4.9. 修改tomcat启动页为自建项目页面 把自建项目拷贝到tomcat的webapps目录下,复制路径
1 2 3 4 5 [root@centos7 tomcat]# cd apache-tomcat-8.5.73 [root@centos7 apache-tomcat-8.5.73]# cd webapps [root@centos7 webapps]# cd blog [root@centos7 blog]# pwd /app/tomcat/apache-tomcat-8.5.73/webapps/blog
打开conf的server.xml,在host下添加<Context>,docBase中添加项目的绝对路径
1 2 3 4 5 <Host name ="localhost" appBase ="webapps" unpackWARs ="true" autoDeploy ="true" > <Context path ="" docBase ="/app/tomcat/apache-tomcat-8.5.73/webapps/blog" debug ="0" reloadable ="true" /> ... </Host >
对于部分项目,默认首页命名方式可能不是index.html时,就需要设置默认打开页面了,修改是只需要设置config目录下web.xml文件即可。修改内容如下:
1 2 3 4 <welcome-file-list > <welcome-file > index.html</welcome-file > </welcome-file-list >
至此,实现了通过https://域名 搭建自己的博客
7.5. 改为使用 nginx 代理 还原tomcat的server.xml配置,并重启tomcat,依旧访问8080端口
1 2 3 4 5 6 7 8 9 10 11 12 13 14 15 16 17 18 19 20 21 22 23 24 25 26 27 28 29 30 31 32 33 34 35 <?xml version="1.0" encoding="UTF-8" ?> <Server port ="8005" shutdown ="SHUTDOWN" > <Listener className ="org.apache.catalina.startup.VersionLoggerListener" /> <Listener className ="org.apache.catalina.core.AprLifecycleListener" SSLEngine ="on" /> <Listener className ="org.apache.catalina.core.JreMemoryLeakPreventionListener" /> <Listener className ="org.apache.catalina.mbeans.GlobalResourcesLifecycleListener" /> <Listener className ="org.apache.catalina.core.ThreadLocalLeakPreventionListener" /> <GlobalNamingResources > <Resource name ="UserDatabase" auth ="Container" type ="org.apache.catalina.UserDatabase" description ="User database that can be updated and saved" factory ="org.apache.catalina.users.MemoryUserDatabaseFactory" pathname ="conf/tomcat-users.xml" /> </GlobalNamingResources > <Service name ="Catalina" > <Connector port ="8080" protocol ="HTTP/1.1" connectionTimeout ="20000" redirectPort ="8443" /> <Engine name ="Catalina" defaultHost ="localhost" > <Realm className ="org.apache.catalina.realm.LockOutRealm" > <Realm className ="org.apache.catalina.realm.UserDatabaseRealm" resourceName ="UserDatabase" /> </Realm > <Host name ="localhost" appBase ="webapps" unpackWARs ="true" autoDeploy ="true" > <Context path ="" docBase ="/app/tomcat/apache-tomcat-8.5.73/webapps/blog" debug ="0" reloadable ="true" /> <Valve className ="org.apache.catalina.valves.AccessLogValve" directory ="logs" prefix ="localhost_access_log" suffix =".txt" pattern ="%h %l %u %t " %r" %s %b" /> </Host > </Engine > </Service > </Server >
下载nginx对应证书,放置于 /etc/nginx的新建文件夹 cert 中
修改nginx.conf:
server listen 443中添加证书信息 ssl_certificate 和 ssl_certificate_key
server_name 替换为购买的域名在 http/server/location层次结构下,添加 proxy_pass http://localhost:8080; 即为tomcat开放的端口
设置HTTP请求自动跳转HTTPS rewrite ^(.*)$ https://$host$1;
至此,可以访问 https://domain.com 访问tomcat
【完整配置 nginx.conf】
1 2 3 4 5 6 7 8 9 10 11 12 13 14 15 16 17 18 19 20 21 22 23 24 25 26 27 28 29 30 31 32 33 34 35 36 37 38 39 40 41 42 43 44 45 46 47 48 49 50 51 52 53 54 55 56 57 58 59 60 61 62 63 64 65 66 67 68 69 70 71 72 73 74 75 76 77 78 79 80 81 82 83 84 85 86 87 88 89 90 91 92 93 94 95 96 97 # For more information on configuration, see: # * Official English Documentation: http://nginx.org/en/docs/ # * Official Russian Documentation: http://nginx.org/ru/docs/ user root; worker_processes auto; error_log /var/log/nginx/error.log; pid /run/nginx.pid; # Load dynamic modules. See /usr/share/doc/nginx/README.dynamic. include /usr/share/nginx/modules/*.conf; events { worker_connections 1024; } http { log_format main '$remote_addr - $remote_user [$time_local] "$request" ' '$status $body_bytes_sent "$http_referer" ' '"$http_user_agent" "$http_x_forwarded_for"'; access_log /var/log/nginx/access.log main; sendfile on; tcp_nopush on; tcp_nodelay on; keepalive_timeout 65; types_hash_max_size 4096; include /etc/nginx/mime.types; default_type application/octet-stream; # Load modular configuration files from the /etc/nginx/conf.d directory. # See http://nginx.org/en/docs/ngx_core_module.html#include # for more information. include /etc/nginx/conf.d/*.conf; server { listen 80; listen [::]:80; server_name domain.com; # root /usr/share/nginx/html; # Load configuration files for the default server block. include /etc/nginx/default.d/*.conf; #将所有HTTP请求通过rewrite指令重定向到HTTPS rewrite ^(.*)$ https://$host$1; location / { root html; index index.html; proxy_pass http://localhost:8080; } error_page 404 /404.html; location = /404.html { } error_page 500 502 503 504 /50x.html; location = /50x.html { } } # Settings for a TLS enabled server. # server { listen 443 ssl http2; listen [::]:443 ssl http2; server_name _; # root /usr/share/nginx/html; ssl_certificate "cert/xx.pem"; ssl_certificate_key "cert/xx.key"; ssl_session_cache shared:SSL:1m; ssl_session_timeout 10m; ssl_ciphers HIGH:!aNULL:!MD5; ssl_prefer_server_ciphers on; # Load configuration files for the default server block. include /etc/nginx/default.d/*.conf; location / { root html; index index.html; proxy_pass http://localhost:8080; } error_page 404 /404.html; location = /40x.html { } error_page 500 502 503 504 /50x.html; location = /50x.html { } } }