sql,nosql等
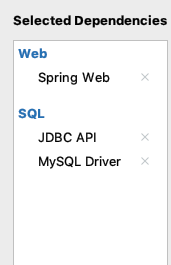
1. JDBC-mysql springboot项目
mysql的jar包:mysql-connector-java-8.0.19.jar
jdbc的jar包 :spring-data-jdbc-1.1.4.RELEASE.jar
1.1. 连接Linux中docker的mysql applicaiton.properties
分别测试
1 2 3 4 5 6 7 8 9 10 11 spring.datasource.driver-class-name =com.mysql.cj.jdbc.Driver spring.datasource.username =root spring.datasource.password =123456 spring.datasource.url =jdbc:mysql://192.168.0.113:3306/springboot spring.datasource.driver-class-name =com.mysql.cj.jdbc.Driver spring.datasource.username =root spring.datasource.password =123456 spring.datasource.url =jdbc:mysql://192.168.0.112:3307/springboot
1.2. 查看是否连接成功 1 2 3 4 5 6 7 8 9 10 11 12 13 14 15 16 17 18 19 20 21 22 23 24 25 26 27 package com.runaccpeted;import org.junit.jupiter.api.Test;import org.junit.runner.RunWith;import org.springframework.beans.factory.annotation.Autowired;import org.springframework.boot.test.context.SpringBootTest;import org.springframework.test.context.junit4.SpringRunner;import javax.sql.DataSource;import java.sql.PreparedStatement;import java.sql.ResultSet;import java.sql.SQLException;import java.sql.Statement;@RunWith(SpringRunner.class) @SpringBootTest class WebsqlApplicationTests { @Autowired DataSource dataSource; @Test void contextLoads () throws SQLException { System.out.println(dataSource.getClass()); } }
取出数据
1 2 3 4 5 6 7 create table user (id int auto_increment not null , uname varchar (50 ) not null , primary key (id)) insert into user values (default ,'a' )
修改测试方法
1 2 3 4 5 6 7 8 9 @Test void contextLoads () throws SQLException { System.out.println(dataSource); ResultSet resultSet=dataSource.getConnection().prepareStatement("select * from user" ).executeQuery(); while (resultSet.next()) { System.out.println(resultSet.getInt(1 )+" " +resultSet.getString(2 )); } }
2.1. DataSourceProperties 配置信息所在位置
1 2 3 4 5 6 7 @ConfigurationProperties(prefix = "spring.datasource") public class DataSourceProperties implements BeanClassLoaderAware , InitializingBean { private String driverClassName; private String url; private String username; private String password; }
2.2. DataSourceConfiguration 根据配置创建数据源,使用spring.datasource.type 指定数据源类型
1 2 3 4 private static final String[] DATA_SOURCE_TYPE_NAMES = new String [] { "com.zaxxer.hikari.HikariDataSource" , "org.apache.tomcat.jdbc.pool.DataSource" , "org.apache.commons.dbcp2.BasicDataSource" };
2.2.1. 自定义数据源 利用反射获取数据源类
1 2 3 4 5 6 7 8 9 10 11 12 @Configuration(proxyBeanMethods = false) @ConditionalOnMissingBean(DataSource.class) @ConditionalOnProperty(name = "spring.datasource.type") static class Generic { @Bean DataSource dataSource (DataSourceProperties properties) { return properties.initializeDataSourceBuilder().build(); } }
build() – DataSourceBuilder
1 2 3 4 5 6 7 public T build () { Class<? extends DataSource > type = getType(); DataSource result = BeanUtils.instantiateClass(type); maybeGetDriverClassName(); bind(result); return (T) result; }
getType()
1 2 3 4 5 6 7 private Class<? extends DataSource > getType() { Class<? extends DataSource > type = (this .type != null ) ? this .type : findType(this .classLoader); if (type != null ) { return type; } throw new IllegalStateException ("No supported DataSource type found" ); }
bind()
1 2 3 4 5 6 7 8 private void bind (DataSource result) { ConfigurationPropertySource source = new MapConfigurationPropertySource (this .properties); ConfigurationPropertyNameAliases aliases = new ConfigurationPropertyNameAliases (); aliases.addAliases("url" , "jdbc-url" ); aliases.addAliases("username" , "user" ); Binder binder = new Binder (source.withAliases(aliases)); binder.bind(ConfigurationPropertyName.EMPTY, Bindable.ofInstance(result)); }
2.3. DataSourceInitializer–运行sql语句 DataSourceAutoConfiguration中导入DataSourceInitializationConfiguration
DataSourceInitializationConfiguration中导入DataSourceInitializerInvoker
DataSourceInitializerInvoker中调用DataSourceInitializer
DataSourceInitializer中真正定义实现sql语句的方法
createSchema() 运行建表语句
initSchema() 运行插入数据语句
1 2 3 4 5 6 7 8 9 10 11 12 13 14 15 16 17 18 19 20 21 22 23 24 25 26 27 28 29 30 31 32 33 34 35 36 37 38 39 40 41 42 43 44 45 46 47 48 49 50 51 52 53 54 55 56 57 58 59 60 61 @Import({ DataSourcePoolMetadataProvidersConfiguration.class, DataSourceInitializationConfiguration.class }) public class DataSourceAutoConfiguration {}@Import({ DataSourceInitializerInvoker.class, DataSourceInitializationConfiguration.Registrar.class }) class DataSourceInitializationConfiguration {}class DataSourceInitializerInvoker implements ApplicationListener <DataSourceSchemaCreatedEvent>, InitializingBean { private final ObjectProvider<DataSource> dataSource; private final DataSourceProperties properties; private final ApplicationContext applicationContext; private DataSourceInitializer dataSourceInitializer; public void afterPropertiesSet () { DataSourceInitializer initializer = getDataSourceInitializer(); if (initializer != null ) { boolean schemaCreated = this .dataSourceInitializer.createSchema(); if (schemaCreated) { initialize(initializer); } } } } class DataSourceInitializer { boolean createSchema () { List<Resource> scripts = getScripts("spring.datasource.schema" , this .properties.getSchema(), "schema" ); if (!scripts.isEmpty()) { if (!isEnabled()) { logger.debug("Initialization disabled (not running DDL scripts)" ); return false ; } String username = this .properties.getSchemaUsername(); String password = this .properties.getSchemaPassword(); runScripts(scripts, username, password); } return !scripts.isEmpty(); } void initSchema () { List<Resource> scripts = getScripts("spring.datasource.data" , this .properties.getData(), "data" ); if (!scripts.isEmpty()) { if (!isEnabled()) { logger.debug("Initialization disabled (not running data scripts)" ); return ; } String username = this .properties.getDataUsername(); String password = this .properties.getDataPassword(); runScripts(scripts, username, password); } } }
2.3.1. 直接运行sql文件 在DataSourceInitializerInvoker定义
文件形式可以为
schema-*.sql ,data-*.sql
在DataSourceInitializer中定义sql文件路径
classpath:/schema-all.sql
classpath:/shema.sql
1 2 3 4 5 6 7 8 9 10 11 12 13 private List<Resource> getScripts (String propertyName, List<String> resources, String fallback) { if (resources != null ) { return getResources(propertyName, resources, true ); } String platform = this .properties.getPlatform(); List<String> fallbackResources = new ArrayList <>(); fallbackResources.add("classpath*:" + fallback + "-" + platform + ".sql" ); fallbackResources.add("classpath*:" + fallback + ".sql" ); return getResources(propertyName, fallbackResources, false ); }
需要配置initialization-mode才能生效
1 spring.datasource.initialization-mode =always
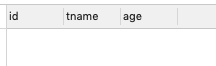
schema-all.sql
1 2 3 4 5 create table teacher( id int auto_increment primary key, tname varchar (50 ) not null , age int not null );
自定义文件
1 spring.datasource.schema =classpath:test.sql
2.4. JdbcTemplate JdbcTemplateAutoConfiguration导入JdbcTemplateConfiguration
JdbcTemplateConfiguration中只有一个方法
1 2 3 4 5 6 7 8 9 10 11 12 13 14 15 16 17 18 @Configuration(proxyBeanMethods = false) @ConditionalOnMissingBean(JdbcOperations.class) class JdbcTemplateConfiguration { @Bean @Primary JdbcTemplate jdbcTemplate (DataSource dataSource, JdbcProperties properties) { JdbcTemplate jdbcTemplate = new JdbcTemplate (dataSource); JdbcProperties.Template template = properties.getTemplate(); jdbcTemplate.setFetchSize(template.getFetchSize()); jdbcTemplate.setMaxRows(template.getMaxRows()); if (template.getQueryTimeout() != null ) { jdbcTemplate.setQueryTimeout((int ) template.getQueryTimeout().getSeconds()); } return jdbcTemplate; } }
JdbcTemplate中定义了jdbc的执行方法
1 public class JdbcTemplate extends JdbcAccessor implements JdbcOperations {}
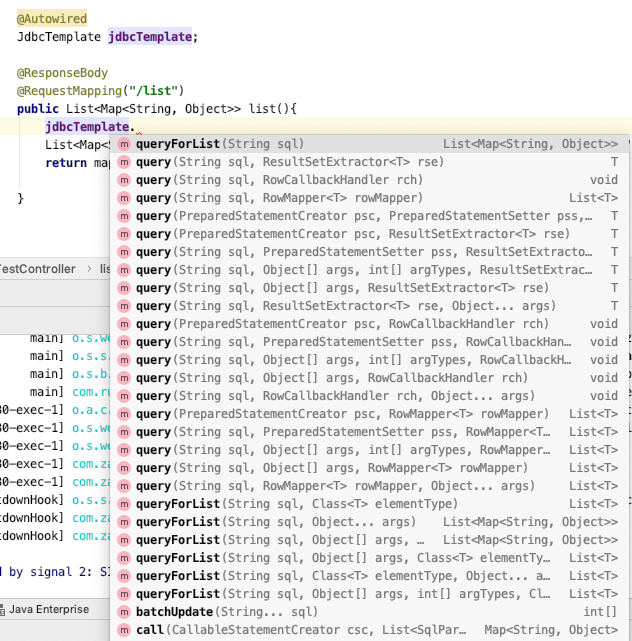
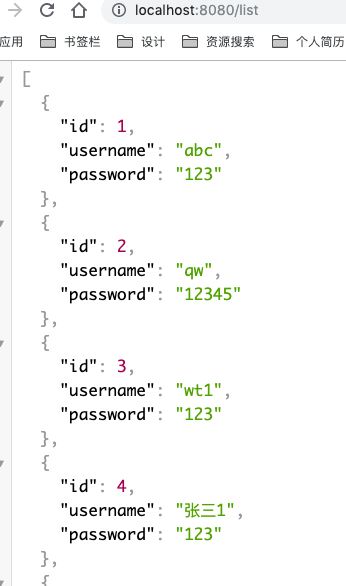
测试jdbc
1 2 3 4 5 6 7 8 9 10 @Autowired JdbcTemplate jdbcTemplate; @ResponseBody @RequestMapping("/list") public List<Map<String, Object>> list () { List<Map<String, Object>> map = jdbcTemplate.queryForList("select * from user" ); return map; }
3. Druid数据源 https://github.com/alibaba/druid/tree/master/druid-spring-boot-starter
阿里云
3.1. Maven包 1 2 3 4 5 <dependency > <groupId > com.alibaba</groupId > <artifactId > druid-spring-boot-starter</artifactId > <version > 1.1.20</version > </dependency >
3.2. 添加配置–application.yml 1 2 3 4 5 6 7 8 9 10 11 12 13 14 15 16 17 18 19 20 21 22 23 24 25 26 27 28 29 30 31 32 33 34 35 36 37 38 39 40 41 42 43 44 45 46 47 48 49 spring : datasource : url : jdbc:mysql://localhost:3306/login username : root password : mysql123// driver-class-name : com.mysql.cj.jdbc.Driver type : com.alibaba.druid.pool.DruidDataSource druid : initial-size : 5 #初始化连接个数 max-active : 20 #最大连接个数 min-idle : 5 #最小连接个数 max-wait : 6000 #最大等待时间 pool-prepared-statements : true #开启缓存PSCache max-pool-prepared-statement-per-connection-size : 20 #指定每个连接上PSCache的大小 time-between-eviction-runs-millis : 6000 #在空闲连接回收器线程运行期间休眠的时间值 min-evictable-idle-time-millis : 100000 # 配置一个连接在池中最小生存的时间 validation-query : SELECT 1 FROM DUAL #用来检测连接是否有效的sql validation-query-timeout : 60000 #检查sql超时时间 test-while-idle : true #申请连接的时候检测 test-on-borrow : false #申请连接时执行validationQuery检测连接是否有效 test-on-return : false #归还连接时执行validationQuery检测连接是否有效 filters : stat,wall,slf4j connection-properties : druid.stat.mergeSql=true;druid.stat.slowSqlMillis=5000 useGlobalDataSourceStat : true # 合并多个DruidDataSource的监控数据 web-stat-filter : enabled : true url-pattern : /* exclusions : /druid/*,*.js,*.gif,*.jpg,*.png,*.css,*.ico stat-view-servlet : enabled : true reset-enable : true login-password : druid login-username : admin allow : deny : 192.168.0.103 url-pattern : /druid/*
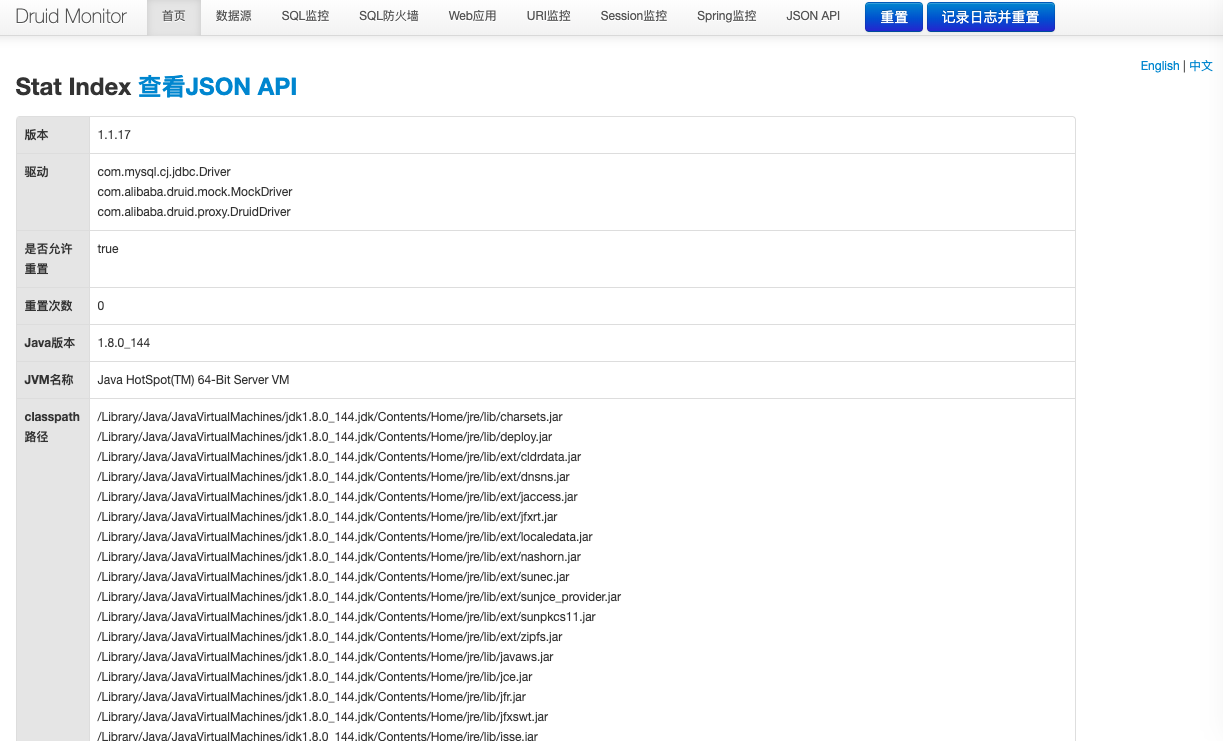
3.3. 访问http://localhost:8080/druid/
输入admin – druid
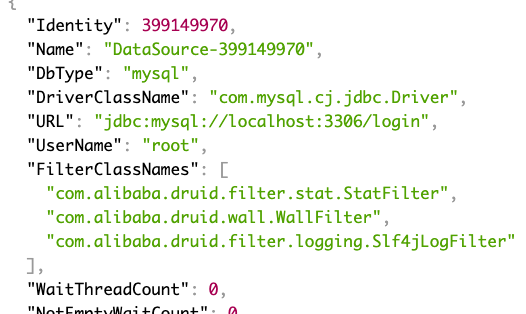
3.4. 查看数据 1 2 3 4 5 6 @RequestMapping("/druid/stat") @ResponseBody public Object druidStat () { return DruidStatManagerFacade.getInstance().getDataSourceStatDataList(); }
http://localhost:8080/druid/stat
4. 整合Mybatis 4.1. Maven 1 2 3 4 5 6 <dependency > <groupId > org.mybatis.spring.boot</groupId > <artifactId > mybatis-spring-boot-starter</artifactId > <version > 2.1.1</version > </dependency >
4.2. 创建Mapper 注解 1 2 3 4 5 6 7 8 9 10 11 12 13 package com.runaccpeted.dao;import com.runaccpeted.pojo.User;import org.apache.ibatis.annotations.Select;import org.springframework.stereotype.Component;import java.util.List;public interface UserMapper { @Select("select * from user") public List<User> list () ; }
4.3. 注册到容器中 @MapperScan 1 2 3 4 5 6 7 8 9 @SpringBootApplication @MapperScan(basePackages = "com.runaccpeted.dao") public class WebsqlApplication { public static void main (String[] args) { SpringApplication.run(WebsqlApplication.class, args); } }
4.4. 忽略表中a_b – 驼峰命名 1 2 3 4 5 6 7 8 9 10 11 12 13 14 15 16 17 18 19 package com.runaccpeted.config;import org.mybatis.spring.boot.autoconfigure.ConfigurationCustomizer;import org.springframework.context.annotation.Bean;import org.springframework.context.annotation.Configuration;@Configuration public class MybatisConfig { @Bean public ConfigurationCustomizer customizer () { return new ConfigurationCustomizer () { @Override public void customize (org.apache.ibatis.session.Configuration configuration) { configuration.setMapUnderscoreToCamelCase(true ); } }; } }
也可以配置在application.properties中
1 2 mybatis.configuration.map-underscore-to-camel-case =true
4.5. 创建Mapper.xml resources/mybatis/mapper/UserMapper.xml
select id对应于com.runaccpeted.mapper.UserMapper接口中的定义方法
接口类中添加@Mapper 或者 Application主类添加@MappingScan
UserMapper.java
1 2 3 4 5 6 7 8 9 10 11 12 13 package com.runaccpeted.mapper;import com.runaccpeted.pojo.User;import org.apache.ibatis.annotations.Mapper;import org.apache.ibatis.annotations.Select;import java.util.List;public interface UserMapper { public List<User> list () ; }
UserMapper.xml
1 2 3 4 5 6 7 8 <?xml version="1.0" encoding="UTF-8" ?> <!DOCTYPE mapper PUBLIC "-//mybatis.org//DTD Mapper 3.0//EN" "http://mybatis.org/dtd/mybatis-3-mapper.dtd" > <mapper namespace ="com.runaccpeted.mapper.UserMapper" > <select id ="list" resultType ="User" > select * from user </select > </mapper >
resources/mybatis/mybatis-config.xml
1 2 3 4 5 6 7 <?xml version="1.0" encoding="UTF-8" ?> <!DOCTYPE configuration PUBLIC "-//mybatis.org//DTD Config 3.0//EN" "http://mybatis.org/dtd/mybatis-3-config.dtd" > <configuration > <typeAliases > <package name ="com.runaccpeted.pojo" /> </typeAliases > </configuration >
指定路径 application.yml
1 2 3 4 spring: mybatis: mapper-locations: classpath:mybatis/mapper/*.xml config-location: classpath:mybatis/mybatis-config.xml
5. 整合JPA 5.1. Maven依赖 1 2 3 4 5 <dependency > <groupId > org.springframework.boot</groupId > <artifactId > spring-boot-starter-data-jpa</artifactId > </dependency >
5.2. Entity类 对应表 1 2 3 4 5 6 7 8 9 10 11 12 13 14 15 16 17 18 19 20 21 22 23 package com.runaccpeted.entity;import javax.persistence.*;@Entity @Table(name="user_entity") public class User { @Id @GeneratedValue(strategy = GenerationType.IDENTITY) private int id; @Column(name = "uname",length = 50) private String username; @Column(name = "pwd") private String password; }
5.3. JpaRepository 数据库交互 1 2 3 4 5 6 7 8 package com.runaccpeted.repository;import com.runaccpeted.entity.User;import org.springframework.data.jpa.repository.JpaRepository; public interface UserRepository extends JpaRepository <User,Integer> {}
5.4. application.yml 配置jpa 1 2 3 4 5 6 7 spring : jpa : hibernate : ddl-auto : update show-sql : true
5.5. CRUD 5.5.1. findById 查询 5.5.2. save 插入 也可用于更新 5.5.3. deleteById 删除 1 2 3 4 5 6 7 8 9 10 11 12 13 14 15 16 17 18 19 20 21 22 23 24 25 26 27 28 29 30 31 32 33 34 35 36 37 38 39 40 41 42 43 44 45 46 47 48 49 50 51 52 53 package com.runaccpeted.controller;import com.runaccpeted.entity.User;import com.runaccpeted.repository.UserRepository;import org.springframework.beans.factory.annotation.Autowired;import org.springframework.stereotype.Controller;import org.springframework.web.bind.annotation.PathVariable;import org.springframework.web.bind.annotation.RequestMapping;import org.springframework.web.bind.annotation.ResponseBody;@Controller @RequestMapping("/jpa") public class jpaController { @Autowired UserRepository userRepository; @RequestMapping("/user/{id}") @ResponseBody public User find (@PathVariable("id") Integer id) { User user = userRepository.findById(id).get(); return user; } @RequestMapping("/user/add") @ResponseBody public User add (String uname,String pwd) { User user = new User (); user.setUsername(uname); user.setPassword(pwd); userRepository.save(user); return user; } @RequestMapping("/user/update/{id}") @ResponseBody public User update (@PathVariable("id") Integer id,String uname,String pwd) { User user = new User (); user.setId(id); user.setUsername(uname); user.setPassword(pwd); userRepository.save(user); return user; } @RequestMapping("/user/delete/{id}") @ResponseBody public boolean delete (@PathVariable("id") Integer id) { userRepository.deleteById(id); return true ; } }
5.6. 运行语句 1 2 3 4 5 6 7 8 9 10 11 12 13 Hibernate : create table user_entity (id integer not null auto_increment, pwd varchar(255), uname varchar(50), primary key (id)) engine=InnoDB Hibernate : insert into user_entity (pwd, uname) values (?, ?) Hibernate : select user0_.id as id1_0_0_, user0_.pwd as pwd2_0_0_, user0_.uname as uname3_0_0_ from user_entity user0_ where user0_.id=? Hibernate : delete from user_entity where id=? Hibernate : insert into user_entity (pwd, uname) values (?, ?)