element步骤条使用
1. 前端页面 - 基本功能显示
https://element.eleme.cn/#/zh-CN/component/steps
1.1. 分配路由
课程大纲,上传课程页面隐藏仅供应路由
1
2
3
4
5
6
7
8
9
10
11
12
13
14
15
16
17
18
19
20
21
22
23
24
25
26
27
28
29
30
31
32
33
34
35
36
| {
path: '/course',
component: Layout,
redirect: '/course/list',
name: '课程管理',
meta: { title: '课程管理', icon: 'component' },
children: [
{
path: 'list',
name: '课程列表',
component: () => import('@/views/edu/course/index'),
meta: { title: '课程列表', icon: 'table' }
},
{
path: 'info',
name: '发布课程',
component: () => import('@/views/edu/course/info'),
meta: { title: '发布课程', icon: 'tree' }
},
{
path: 'chapter/:id',
name: '课程大纲',
component: () => import('@/views/edu/course/chapter'),
meta: { title: '课程大纲', icon: 'tree' },
hidden: true
},
{
path: 'publish/:id',
name: '上传课程',
component: () => import('@/views/edu/course/publish'),
meta: { title: '上传课程', icon: 'tree' },
hidden:true
}
]
}
|
1.2. 课程基本信息 - info.vue
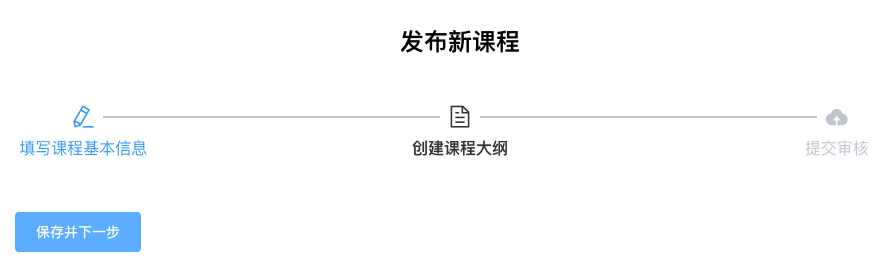
通过<el-steps :active="1"></el-steps>的active控制哪一个el-step显示,按钮跳转至/course/chapter/1
1
2
3
4
5
6
7
8
9
10
11
12
13
14
15
16
17
18
19
20
21
22
23
24
25
26
27
28
29
30
31
32
33
34
| <template>
<div class="app-container">
<h2 style="text-align: center;margin-bottom: 50px;">发布新课程</h2>
<el-steps :active="1" align-center style="margin-bottom: 50px;">
<el-step title="填写课程基本信息" icon="el-icon-edit"></el-step>
<el-step title="创建课程大纲" icon="el-icon-document"></el-step>
<el-step title="提交审核" icon="el-icon-upload"></el-step>
</el-steps>
<el-form label-width="120px">
<el-form-item>
<el-button :disabled="saveBtnDisabled" type="primary" @click="next">保存并下一步</el-button>
</el-form-item>
</el-form>
</div>
</template>
<script>
export default {
data(){
return{
}
},
created(){
},
methods:{
next(){
this.$router.push({
path:"/course/chapter/1"
})
}
}
}
</script>
|
1.3. 课程大纲 - chapter.vue
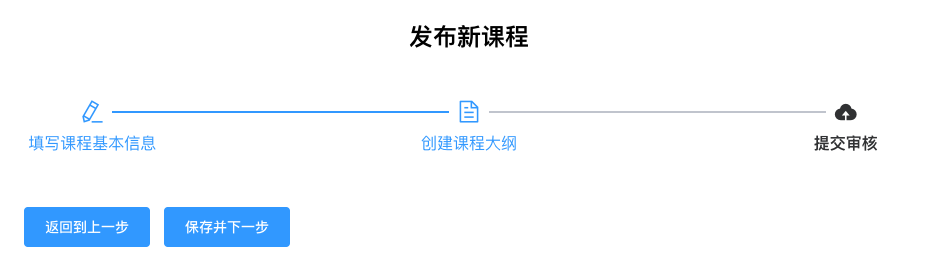
设置active为2,创建课程大纲显现
1
2
3
4
5
6
7
8
9
10
11
12
13
14
15
16
17
18
19
20
21
22
23
24
25
26
27
28
29
30
31
32
33
34
35
36
37
38
39
40
| <template>
<div class="app-container">
<h2 style="text-align: center;margin-bottom: 50px;">发布新课程</h2>
<el-steps :active="2" align-center style="margin-bottom: 50px;">
<el-step title="填写课程基本信息" icon="el-icon-edit"></el-step>
<el-step title="创建课程大纲" icon="el-icon-document"></el-step>
<el-step title="提交审核" icon="el-icon-upload"></el-step>
</el-steps>
<el-form label-width="120px">
<el-form-item>
<el-button :disabled="saveBtnDisabled" type="primary" @click="primary">返回到上一步</el-button>
<el-button :disabled="saveBtnDisabled" type="primary" @click="next">保存并下一步</el-button>
</el-form-item>
</el-form>
</div>
</template>
<script>
export default {
data(){
return{
}
},
created(){
},
methods:{
next(){
this.$router.push({
path:"/course/publish/1"
})
},
primary(){
this.$router.push({
path:'/course/info'
})
}
}
}
</script>
|
1.4. 提交审核 - publish.vue
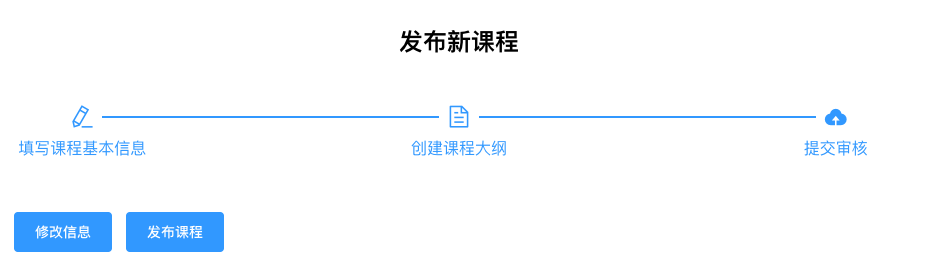
通过设置active为3
1
2
3
4
5
6
7
8
9
10
11
12
13
14
15
16
17
18
19
20
21
22
23
24
25
26
27
28
29
30
31
32
33
34
35
36
37
38
| <template>
<div class="app-container">
<h2 style="text-align: center;margin-bottom: 50px;">发布新课程</h2>
<el-steps :active="3" align-center style="margin-bottom: 50px;">
<el-step title="填写课程基本信息" icon="el-icon-edit"></el-step>
<el-step title="创建课程大纲" icon="el-icon-document"></el-step>
<el-step title="提交审核" icon="el-icon-upload"></el-step>
</el-steps>
<el-form label-width="120px">
<el-form-item>
<el-button :disabled="saveBtnDisabled" type="primary" @click="primary">修改信息</el-button>
<el-button :disabled="saveBtnDisabled" type="primary" @click="next">发布课程</el-button>
</el-form-item>
</el-form>
</div>
</template>
<script>
export default {
data(){
return{
}
},
created(){
},
methods:{
next(){
},
primary(){
this.$router.push({
path:"/course/chapter/1"
})
}
}
}
</script>
|
2. 前端功能 - 课程基本信息填写
2.1. info.vue
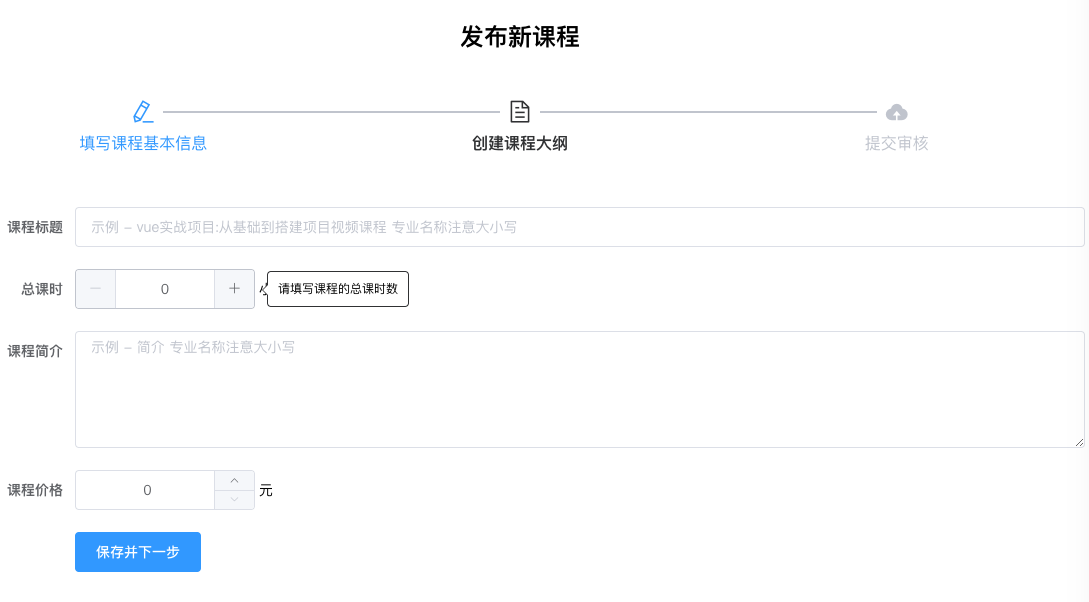
courseObj 携带课程title,lessonNum,price,description用于传给后端
1
2
3
4
5
6
7
8
9
10
11
12
13
14
15
16
17
18
19
20
21
22
23
24
25
26
27
28
29
30
31
32
33
34
35
36
37
38
39
40
| <el-form label-width="120px" :model="courseObj">
<el-form-item label = "课程标题">
<el-input v-model="courseObj.title" placeholder="示例 - vue实战项目:从基础到搭建项目视频课程 专业名称注意大小写"/>
</el-form-item>
<el-form-item label="总课时">
<el-tooltip placement="right" effect="light">
<div slot="content">请填写课程的总课时数</div>
<el-input-number :min="0" v-model="courseObj.lessonNum" placeholder="单位小时"/>
</el-tooltip>
小时
</el-form-item>
<el-form-item label = "课程简介">
<el-input v-model="courseObj.decription" type="textarea" rows="5" placeholder="示例 - 简介 专业名称注意大小写"/>
</el-form-item>
<el-form-item label="课程价格">
<el-tooltip content="免费课程请设置为0元" placement="right" effect="light">
<!--https://element.eleme.cn/#/zh-CN/component/input-number -->
<el-input-number :min="0.00" :precision="2" v-model="courseObj.price" controls-position="right" step="0.01"/>
</el-tooltip>
元
</el-form-item>
<el-form-item>
<el-button :disabled="saveBtnDisabled" type="primary" @click="next">保存并下一步</el-button>
</el-form-item>
</el-form>
<script>
data(){
return{
saveBtnDisabled:false,
courseObj:{
title:'',
decription: '',
lessonNum: 0,
price: 0.00
}
}
}
</script>
|
3. 后端功能 - 插入数据到课程表和课程信息表
3.1. EduCoureseDescription
修改id的生成策略
1
2
3
4
| @ApiModelProperty(value = "课程ID")
@TableId(value = "id", type = IdType.INPUT)
private String id;
|
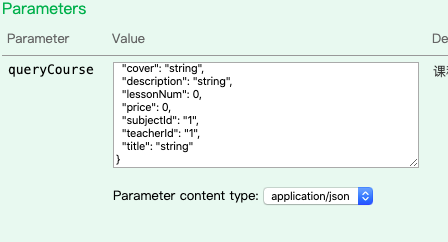
3.2. QueryCourse
承接前端传入的数据
1
2
3
4
5
6
7
8
9
10
11
12
13
14
15
16
17
18
19
20
21
22
23
24
25
26
27
28
29
30
31
32
33
34
35
36
37
38
| package com.online.edu.eduservice.entity.query;
import com.baomidou.mybatisplus.annotation.IdType;
import com.baomidou.mybatisplus.annotation.TableId;
import io.swagger.annotations.Api;
import io.swagger.annotations.ApiModelProperty;
import lombok.Data;
import java.math.BigDecimal;
@Api("课程信息")
@Data
public class QueryCourse {
@ApiModelProperty(value = "课程ID")
private String id;
@ApiModelProperty(value = "课程讲师ID")
private String teacherId;
@ApiModelProperty(value = "课程专业ID")
private String subjectId;
@ApiModelProperty(value = "课程标题")
private String title;
@ApiModelProperty(value = "课程封面图片路径")
private String cover;
@ApiModelProperty(value = "课程销售价格,设置为0则可免费观看")
private BigDecimal price;
@ApiModelProperty(value = "总课时")
private Integer lessonNum;
@ApiModelProperty(value = "课程简介")
private String description;
}
|
3.3. EduCourseServiceImpl - addCourseInfo
课程表和描述表都需要插入
先根据传入的内容插入到edu_course表中
两张表是一对一的,故根据生成的id值,插入到edu_course_description表
将id传给前端,用于以后章节表,上传课程的id传输
1
2
3
4
5
6
7
8
9
10
11
12
13
14
15
16
17
18
19
20
21
22
23
24
25
26
27
28
29
30
31
32
33
34
35
36
37
38
39
40
41
42
43
44
45
46
47
48
| package com.online.edu.eduservice.service.impl;
import com.fasterxml.jackson.databind.util.BeanUtil;
import com.online.edu.eduservice.entity.EduCourse;
import com.online.edu.eduservice.entity.EduCourseDescription;
import com.online.edu.eduservice.entity.query.QueryCourse;
import com.online.edu.eduservice.exception.EduException;
import com.online.edu.eduservice.mapper.EduCourseMapper;
import com.online.edu.eduservice.service.EduCourseDescriptionService;
import com.online.edu.eduservice.service.EduCourseService;
import com.baomidou.mybatisplus.extension.service.impl.ServiceImpl;
import org.springframework.beans.BeanUtils;
import org.springframework.beans.factory.annotation.Autowired;
import org.springframework.stereotype.Service;
@Service
public class EduCourseServiceImpl extends ServiceImpl<EduCourseMapper, EduCourse> implements EduCourseService {
@Autowired
EduCourseDescriptionService eduCourseDescriptionService;
@Override
public String addCourseInfo(QueryCourse queryCourse) {
EduCourse eduCourse = new EduCourse();
BeanUtils.copyProperties(queryCourse,eduCourse);
int flag = baseMapper.insert(eduCourse);
boolean result = false;
if(flag==0){
throw new EduException(20001,"添加课程信息失败");
}else {
String id = eduCourse.getId();
EduCourseDescription description = new EduCourseDescription();
description.setId(id);
description.setDescription(queryCourse.getDescription());
result = eduCourseDescriptionService.save(description);
}
if (result) {
return eduCourse.getId();
}
return null;
}
}
|
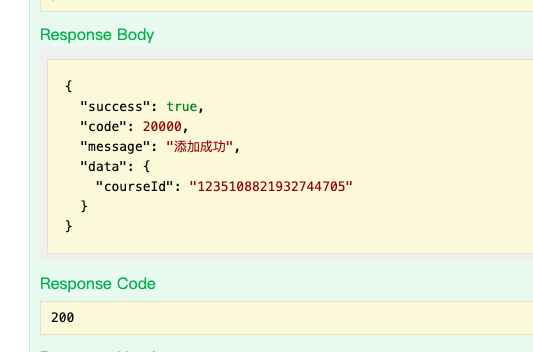
3.4. EduCourseController - addCourseInfo
1
2
3
4
5
6
7
8
9
10
11
12
13
14
15
16
17
18
19
20
21
22
23
24
25
26
27
28
29
| package com.online.edu.eduservice.controller;
import com.online.edu.common.R;
import com.online.edu.eduservice.entity.query.QueryCourse;
import com.online.edu.eduservice.service.EduCourseService;
import io.swagger.annotations.ApiParam;
import org.springframework.beans.factory.annotation.Autowired;
import org.springframework.web.bind.annotation.*;
@RestController
@RequestMapping("/eduservice/edu-course")
@CrossOrigin
public class EduCourseController {
@Autowired
EduCourseService eduCourseService;
@PostMapping("/insertCourse")
public R addCourseInfo(@ApiParam("课程信息") @RequestBody QueryCourse queryCourse){
String id = eduCourseService.addCourseInfo(queryCourse);
if(id!=null){
return R.ok().message("添加成功").data("courseId",id);
}else {
return R.error().message("添加失败");
}
}
}
|
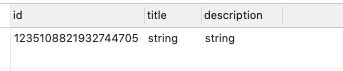
3.5. 测试功能
查询数据库
1
| select c.id,c.title,d.description from edu_course c left join edu_course_description d on c.id=d.id
|
4. 课程信息中加入讲师名称
4.1. 后端查询数据 - EduTeacherController - selAll()
1
2
3
4
5
6
| @ApiOperation(value = "所有讲师列表")
@GetMapping("/listTeachers")
public R selectAll(){
List<EduTeacher> teachers =eduTeacherService.list(null);
return R.ok().data("items",teachers);
}
|
4.2. 添加查询所有讲师方法 - teacher.js
1
2
3
4
5
6
7
|
getTeacherList(){
return request({
url:`${base}/listTeachers`,
method:'get'
})
}
|
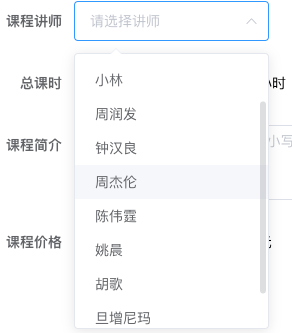
4.3. 建立下拉框显示所有讲师信息 - info.vue
https://element.eleme.cn/#/zh-CN/component/select
1
2
3
4
5
6
7
8
9
10
11
12
13
14
15
16
17
18
19
20
21
22
23
24
25
26
27
28
29
30
31
32
33
34
35
36
37
38
39
| <!-- 查询所有讲师 下拉框-->
<el-form-item label="课程讲师">
<el-select v-model="courseObj.teacherId" placeholder="请选择讲师">
<el-option
v-for="teacher in teacherList"
:key="teacher.id"
:label="teacher.name"
:value="teacher.id"/>
</el-select>
</el-form-item>
<script>
import teacher from '@/api/edu/teacher'
export default {
data(){
return{
teacherList:[],
}
},
created(){
this.getTeacherList()
//根据路由选择不同操作 插入/更新
this.init()
},
methods:{
//得到讲师信息
getTeacherList(){
teacher.getTeacherList()
.then(response=>{
//console.log(response)
this.teacherList = response.data.items
}).catch(respose=>{
})
}
}
}
</script>
|
4.4. 显示讲师
5. 课程信息中加入科目分类信息
5.1. 导入subject-getSubjectList方法
1
2
3
4
5
6
| getSubjectList(){
return request({
url:`${base}/list`,
method:'get'
})
}
|
导入
1
2
3
4
5
6
7
8
9
10
11
12
13
14
15
16
17
18
19
20
| <script>
import subject from '@/api/edu/subject'
export default{
data(){
return{
subjectList :[]
}
},
created(){
this.getSubjectList()
},
methods:{
//得到科目分级列表
getSubjectList(){
subject.getSubjectList().then(response=>{
this.subjectList = response.data.nestedList
}).catch()
}
}
</script>
|
5.2. 多级联动 - cascader
https://element.eleme.cn/#/zh-CN/component/cascader
1
2
3
4
5
6
7
8
9
10
11
12
13
14
15
16
17
18
19
20
21
22
23
24
25
26
27
28
29
30
31
32
33
34
35
| <el-form-item label="课程分类">
<!--
props 配置选项
v-model 选中项绑定值
options 可选项数据源,键名通过 Props 属性配置
-->
<el-cascader
:props="defaultProps"
v-model="courseObj.subjectId"
:options="subjectList"
>
</el-cascader>
</el-form-item>
<script>
export default{
data(){
return(){
//value 指定选项的值为选项对象的某个属性值
//label 指定选项标签为选项对象的某个属性值
//children 指定选项的子选项为选项对象的某个属性值
//expandTrigger 次级菜单的展开方式
//emitPath 在选中节点改变时,是否返回由该节点所在的各级菜单的值所组成的数组,若设置 false,则只返回该节点的值
//checkStrictly 来设置父子节点取消选中关联,从而达到选择任意一级选项的目的
defaultProps: {
children: 'children',
label: 'title',
value: 'id',
expandTrigger: 'hover',
emitPath: false,
checkStrictly : true
}
}
}
}
</script>
|
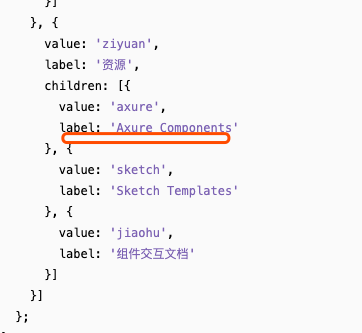
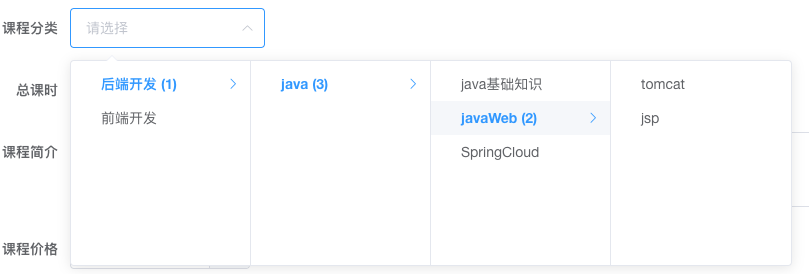
5.2.1. 没有叶节点问题
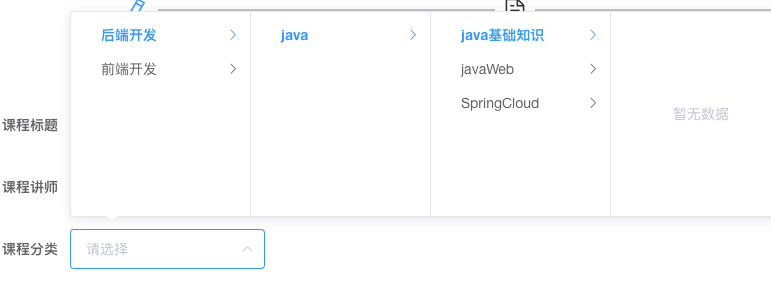
5.2.2. 后台传入的无论父子科目都有children变量
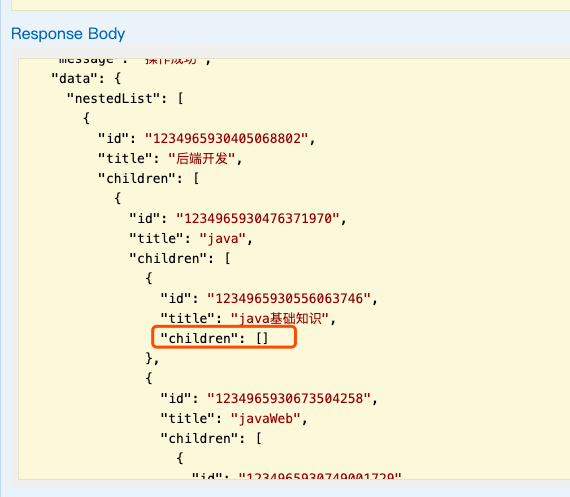
5.2.3. 而实例中叶科目无children变量
5.2.4. 试图得到每个节点信息-采用自定义节点内容
可以通过scoped slot对级联选择器的备选项的节点内容进行自定义,scoped slot会传入两个字段 node 和 data,分别表示当前节点的 Node 对象和数据。
通过dealLeaf(node)方法得到node所有信息
1
2
3
4
5
6
7
8
9
10
11
12
13
14
15
16
17
18
19
20
21
22
23
24
25
26
27
28
29
30
31
32
33
34
35
36
37
38
39
| <el-form-item label="课程分类">
<!--
props 配置选项
v-model 选中项绑定值
options 可选项数据源,键名通过 Props 属性配置
show-all-levels 仅显示最后一级
change 当选中节点变化时触发
-->
<el-cascader
:props="defaultProps"
v-model="courseObj.subjectId"
:options="subjectList"
clearable
:show-all-levels="false"
@change="handleChange"
>
<template slot-scope="{ node, data }">
<!-- 当节点的子节点数为0时,输出节点信息-->
<span v-if="data.children.length===0">
{{dealLeaf(node)}}
</span>
<span>{{ node.label }}</span>
<!-- 得到子节点个数 -->
<span v-if="!node.isLeaf">
({{ data.children.length }})
</span>
</template>
</el-cascader>
</el-form-item>
<script>
export default{
methods:{
dealLeaf(node){
console.log(node)
}
}
}
</script>
|
5.2.4.1. 控制台得到信息
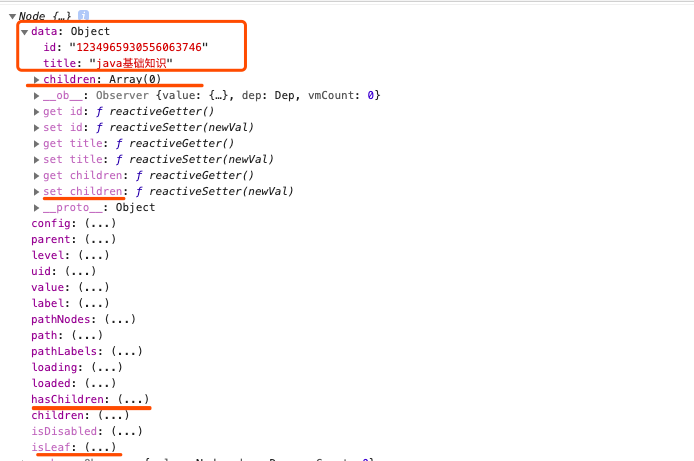
或许可以通过设置hasChildren=false来控制节点是否成为叶节点
5.2.4.2. node.hasChildren=false
1
2
3
4
| dealLeaf(node){
node.hasChildren=false
console.log(node)
}
|
5.2.4.3. 运行结果
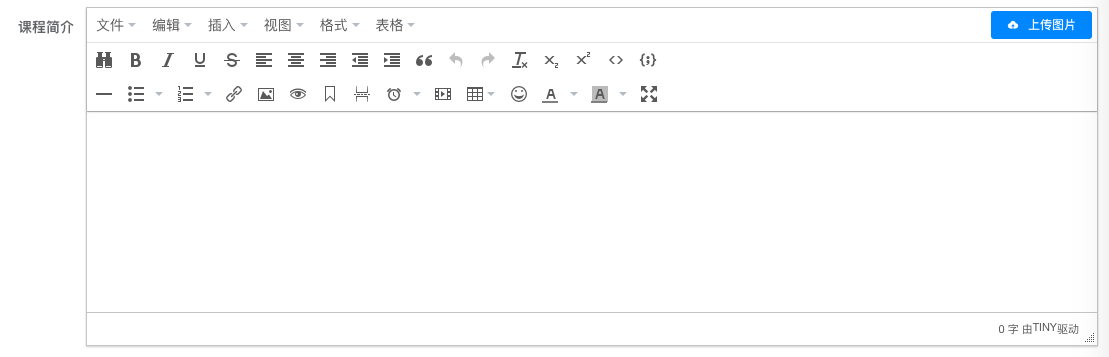
6. 课程简介采用富文本-Tinymce
https://panjiachen.github.io/vue-element-admin-site/feature/component/rich-editor.html#tinymce
将插件引入文件
1
2
3
4
5
6
7
8
9
10
| <el-form-item label = "课程简介">
<tinymce v-model="courseObj.description" :height="200" />
</el-form-item>
<script>
import Tinymce from '@/components/Tinymce'
export default {
components: { Tinymce }
}
</script>
|
默认显示的是英文,修改配置文件

7. 测试传输数据
1
2
3
4
5
6
7
8
| <script>
next(){
console.log(this.courseObj)
this.$router.push({
path:"/course/chapter/"+this.courseObj.id
})
}
</script>
|
富文本的内容都是本地的,图片被 base64技术转为一长串字符

description中的内容就是html代码,可以直接输出
就是生成时间有点长
8. 封面上传-图片列表缩略图
https://element.eleme.cn/#/zh-CN/component/upload
action 上传地址
name 文件参数名
on-success 文件上传成功时的钩子 – function(response, file, fileList)
before-upload上传前的钩子 用于处理是否上传的是图片及图片大小 – function(file)
before-remove 删除文件之前的钩子,参数为上传的文件和文件列表 – function(file, fileList)
on-preview 点击文件列表中已上传的文件时的钩子 – function(file)
1
2
3
4
5
6
7
8
9
10
11
12
13
14
15
16
17
18
19
20
21
22
23
24
25
26
27
28
29
30
31
32
33
34
35
36
37
38
39
40
41
42
43
44
45
46
47
48
49
50
51
52
53
54
55
56
57
58
59
60
61
62
63
64
65
| <el-upload
class="avatar-uploader"
:action="path"
name="file"
:on-success="handleSuccess"
:on-preview="handlePreview"
:before-remove="handleRemove"
:before-upload="handleUpload"
list-type="picture">
<el-tooltip content="只能上传jpg/png文件,且不超过500kb" placement="right" effect="light">
<el-button size="small" type="primary" :disabled="UpoladBtnDisabled">点击上传</el-button>
</el-tooltip>
</el-upload>
<!-- 点击查看大图 -->
<el-dialog :visible.sync="dialogVisible">
<img width="100%" height="50%" :src="dialogImageUrl" alt="">
</el-dialog>
<script>
data(){
return{
UpoladBtnDisabled:false,
dialogVisible:false,
path:'http://localhost:8080/eduservice/upload?param=video'
}
}
methods:{
//删除文件之前的钩子
handleRemove(file, fileLis) {
//console.log(file, fileList);
this.UpoladBtnDisabled=false
},
//点击文件列表中已上传的文件时的钩子
handlePreview(file) {
//console.log(file)
this.dialogImageUrl = file.url
this.dialogVisible = true
},
//文件上传成功时的钩子
handleSuccess(response,file){
//禁用按钮
this.UpoladBtnDisabled = true
//上传封面至oss
this.courseObj.cover = response.data.path
this.dialogImageUrl=response.data.path
},
//上传文件之前的钩子 限制文件大小和类型
handleUpload(file){
const isJPG = file.type === 'image/jpeg';
const isLt2M = file.size / 1024 / 500 < 1;
if (!isJPG) {
this.$message.error('上传头像图片只能是 JPG 格式!');
}
if (!isLt2M) {
this.$message.error('上传头像图片大小不能超过 500kb!');
}
return isJPG && isLt2M;
}
}
</script>
|
8.1. 实现效果
#
实现上传功能
8.2. edu/course.js
1
2
3
4
5
6
7
8
9
10
11
12
13
| import request from '@/utils/request'
const base = '/eduservice/edu-course'
export default{
insertCourse(courseObj){
return request({
url:`${base}/insertCourse`,
method:'post',
data:courseObj
})
}
}
|
8.3. view/edu/course/info.vue
上传点击事件在next方法上
1
2
3
4
5
6
7
8
9
10
11
12
13
14
15
16
17
18
19
20
21
22
23
24
25
26
27
28
29
30
31
32
33
34
35
36
37
| <script>
import course from '@/api/edu/course'
data(){
},
methods:{
next(){
//根据内容判断实现 插入/更新
if(this.courseObj.title === ''){
}else{
this.insertCourse()
}
},
insertCourse(){
course.insertCourse(this.courseObj).then(response=>{
this.$message({
type:'success',
message:response.message
})
//console.log(response)
this.courseObj.id = response.data.courseId
//成功后跳转至步骤2
this.$router.push({
path:'/course/chapter/'+this.courseObj.id
})
}).catch(response=>{
this.$message({
type:'error',
message:response.message
})
})
}
}
</script>
|