将mysql安装到本地,并通过navicat图形化操控数据库
1. 数据库安装
数据库下载 ,选择的是Mac对应版本
下载解压
1
2
| cd Downloads
tar -xzvf mysql-xxx.tar.gz
|
复制到/usr/local/目录
1
| sudo mv /Downloads/mysql-xxx /usr/local/mysql
|
配置环境变量
1
2
3
4
5
6
7
| open -e .bash_profile
#添加环境变量
export MYSQL_HOME=/usr/local/mysql
export PATH=$MYSQL_HOME/bin:$MYSQL_HOME/support-files:$PATH
source .bash_profile
|
进入到local
看到mysql所属用户及用户组
1
| lrwxr-xr-x 1 root wheel 30 9 9 11:44 mysql -> mysql-8.0.17-macos10.14-x86_64
|
执行
1
| sudo chown -R root:admin mysql
|
重新查看
1
| lrwxr-xr-x 1 root admin 30 9 9 11:44 mysql -> mysql-xxx
|
现在可以通过mysql进入数据库
1
2
3
4
5
| mysql
Type 'help;' or '\h' for help. Type '\c' to clear the current input statement.
mysql>
|
更新密码
1
2
3
4
5
| mysql> flush privileges;
mysql> alter user 'root'@'localhost' identified by '密码';
mysql> exit;
|
重启数据库
1
| sudo mysql.server restart
|
输入
Enter password:
输入密码即可登入
2. 配置主从数据库
创建用户
create user 'backup'@'%' identified by '123456';
刷新
flush privileges;
赋予权限
grant replication slave on *.* to 'backup'@'%';
查看数据库
select user,host,plugin from mysql.user;
查看主数据库状态
show master status\G;
1
2
3
4
5
6
7
8
9
10
11
12
13
14
15
16
17
18
19
20
21
22
23
24
25
26
27
28
29
30
| mysql> use mysql;
Reading table information for completion of table and column names
You can turn off this feature to get a quicker startup with -A
Database changed
mysql>
mysql> create user 'backup'@'%' identified by '123456';
Query OK, 0 rows affected (0.06 sec)
mysql> flush privileges;
Query OK, 0 rows affected (0.02 sec)
mysql>
mysql> grant replication slave on *.* to 'backup'@'%';
Query OK, 0 rows affected (0.02 sec)
mysql>
mysql> select user,host,plugin from mysql.user;
+------------------+-----------+-----------------------+
| user | host | plugin |
+------------------+-----------+-----------------------+
| backup | % | mysql_native_password |
| mysql.infoschema | localhost | caching_sha2_password |
| mysql.session | localhost | caching_sha2_password |
| mysql.sys | localhost | caching_sha2_password |
| root | localhost | mysql_native_password |
+------------------+-----------+-----------------------+
5 rows in set (0.00 sec)
mysql> show master status\G;
|
3. 连接到navicat
Navicat官网 https://www.navicat.com.cn/
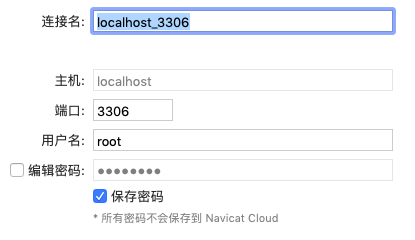
4. 连接数据库
1
2
3
4
5
| # 连接local
$ mysql -uroot -p
# 连接指定ip
$ mysql -h(ip地址) -uroot -p(ip机密码)
$ mysql --host=ip --user=root --password=密码
|
4.1. 查看数据库信息
1
2
3
4
5
| mysql> show databases;
mysql> create database if not exists test;
mysql> drop database test;
mysql> use test;
mysql> show tables;
|
5. 退出数据库